Sugar Skull Makeup
Day of the Dead Makeup! After a few requests for this look, I decided to show you guys how to do this Sugar Skull tutorial that i wear on Halloween night.
Products used:-
1. Shu uemura Poreraser CC UV under base mousse SPF35 PA+++
2. Kryolan professional make up Supracolor grease make up #070 white
3. bareMinerals Original SPF15 foundation #N10 fairly light
4. thecandyskin Contour Palette #Passion Highlight with #Sunshine
5. thecandyskin Contour Palette #Passion Contour with #BitterCocoa
6. Laura Mercier Long wear creme eye pencil #Noir
7. Kryolan professional make up Supracolor grease make up #071 black
8. Kryolan professional make up Supracolor grease make up #071 black
Steps:-
Apply make up base before start the sugar skull make up tutorial, use the sponge to apply the base, the mouse is light in air so that it won't fall off from your hand. Begin with cheek area, from outside inward then nose, fore head, chin and don't forget the neck area. Apply in gently strokes.
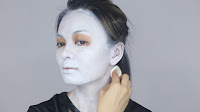
Next step is to apply white color foundation for whole face, neck and also ear. You may putting a few layer as white as possible avoiding eye area as I'm going to draw black circle around my eye areas.
Now take your bare mineral powder to set the make up for long lasting effect. Apply gently with the powder brush with tapping motion.
Next is to highlight and contour your face. Start highlight from the nose bridge, outer C of your eye areas, forehead, side of the cheek above your jawline and your chin area. Contour the hallow of the cheek, temple of face and side of nose to make the shadow more depth effect.
Now move on to the eyes. First outline with the black pencil eyeliner, then draw a V on the middle of your nose and draw the crack area around the eyes, under eyes area, socket of the cheek area toward the mouth area, forehead, chin and lastly your neck, outline the throat and these are the area need to be paint with black color foundation.
Start to filling in the black color foundation with the liner brush.
Start to line the teeth from the center with very thin line. You can draw your back teeth a little bit bigger.
Now, re-apply the white color foundation to make your teeth more obvious.
Next shape the middle line of the teeth and start curve the line out like inverted V-shape because shaping around each tooth will make it look more realistic.
Blend softly with the black color eyeshadow.
Now touch up with pat some black color eye shadow to avoid oiliness and crease of eyes make up.
Move on to the neck area, use a bigger make up brush to fill in with black color foundation along the jawline to the neck area and outline with white color foundation to make the throat bone.
Done !!!
.
..
...
....
.....
Hope you guys enjoy the tutorial~
Check out the complete tutorial and how i done the hair from my video, good luck! ❤
☟☟FOLLOW ME☟☟
•Facebook: https://www.facebook.com/lynetteteemakeup
•Instagram: http://instagram.com/lynetteteemakeup/
•Tumblr: http://lynetteteemakeup.tumblr.com/
•Twitter: http://twitter.com/lynettetee04
•Pinterest: http://pinterest.com/lynettetee/
Lynetteteemakeup ©


No comments:
Post a Comment