Showing posts with label diy. Show all posts

Thursday, 31 October 2019

How To Reattach Hand

How To Reattach Hand
Hi guys, this is the second special effect video for this Halloween. This tutorial gonna teach you how to create reattached hand in a graphic style like you saw from the horror movie style. Here's an in-depth video walk through and tutorial on how to reattach hand with a needle. Hope this video will helps you.

Product Used:-
1.Make up for ever plasto wax 
2.Spatula 
3.Make-up designory's palette #Dull-red 
4.Make-up designory's palette #Red 
5.Make-up designory's palette#Black 
6.Needle 
7. Black string 
8.Fake blood

Steps:-
First, take some wax and use the hand to knead the wax into a long shape
 Then put on my wrist and use the spatula to blend the wax with my hand
 
After this use finger to blend out the wax to make more real 
Do the same step for another side of the wax
Apply the wine red cream color to the cut by using the water color brush
After that, apply some black cream color on the cut with the watercolor brush, to create a deep cut effect
Use your finger apply the wine red cream color to dab the side of wound, you can also mix the red cream color, and use your finger to blend the color out gently
 
Now start to sew the wound, or you can put the thread however you like 
And press it on the wax to make it look like it's sewed on and then use wax to cover up the thread to make it real
Finally, use the water color brush put the fake flood on the wound and blend it 

The reattached hand is done!!
You can check out the full video tutorial here.
If you have any questions about how I made this, feel free to ask in the comments!

☟☟FOLLOW ME☟☟
Lynetteteemakeup © 

How To Create Cracked Nail

How To Create Cracked Nail
Hi guys, today I'm going to show you guys how to create cracked nail. This video teach you how to create the nail with crackle effect. This video suitable for your Halloween Day!! 

Product Used:-
1.Fake nail 
2.Make up for ever plasto wax 
3.Make-up designory's palette #Dull-red 
4.Make-up designory's palette #Black 
5.Water color brushes 
6.Spatula 
7.Fake blood

Steps:-
Firstly, need to cut and split into the fake nail
Then use the wax to cover my finger, with this way it will be able to create the peak near cuts area
With the water color brush, use dull-red cream color dab on the finger nail to create damage skin looking 
Now apply spirit gum on the finger
After this use a water color brush dot some fake blood on the finger
Put the fake nail on the finger, make it look like it's cracked 
Now use the brush and apply black watercolor to outlined the cuticle area and in the middle of the cracked nail
Next use the spatula create a cut
Then apply the black and dull-red cream color on the cut area, to create a deep cut effect 
Apply fake blood on the split area with the water color brush, make it look more realistic
 
Finally, use your finger dab the dull-red cream color at lateral wound

Done! 
You can check out the full video tutorial here.
If you have any questions about how I made this, feel free to ask in the comments!

☟☟FOLLOW ME☟☟
Lynetteteemakeup © 

Saturday, 10 March 2018

Easy & Quick DIY Choker Necklaces

Easy & Quick DIY Choker Necklaces
Hello everyone! I'm OBSESSED with the choker trend, and I decided to show you how to make your own choker necklace with this easy step by step tutorial. It's super fast, easy and cheap, in just few minutes you can make any style choker you like.

Products used :-
1. Ribbons (preferably lace ones)
2. Gold chain
3. Gold jump rings
4. Gold ribbon crimps
5. Gold lobster claw clasps
6. Gold head pin
7. White beads
8. Ruler
9. Pliers
10. Scissors

Steps :-
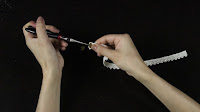
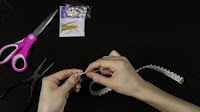
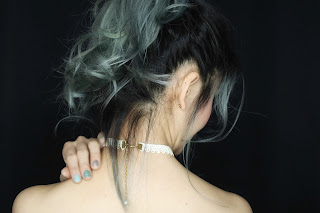
Easy & Quick DIY Choker Necklaces-Now, first, get your ribbon crimps, put your ribbon in between your crimp and hold it in place.
Now, first, get your ribbon crimps, put your ribbon in between your crimp and hold it in place.
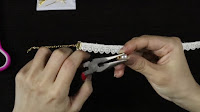
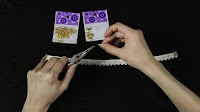
Easy & Quick DIY Choker Necklaces-Then, use your pliers to crimp them on each end of your favorite choice of ribbon, like that!
Then, use your pliers to crimp them on each end of your favorite choice of ribbon, like that! 
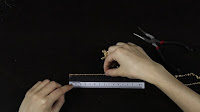
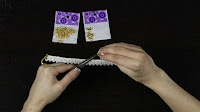
Easy & Quick DIY Choker Necklaces-Second step, get your gold chain, measure it with your ruler.
Second step, get your gold chain, measure it with your ruler.
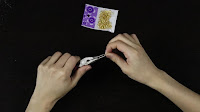
Easy & Quick DIY Choker Necklaces- Use your pliers and cut it for about 7cm long.
 Use your pliers and cut it for about 7cm long.
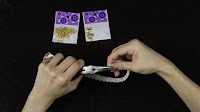
Easy & Quick DIY Choker Necklaces-After that, get your jump rings. Make a gap in between the jump rings.
After that, get your jump rings. Make a gap in between the jump rings.
 Easy & Quick DIY Choker Necklaces- You can hook it on the gold chain and now.
 You can hook it on the gold chain and now.
Easy & Quick DIY Choker Necklaces-  Get your ribbon and hook the jump ring on the ribbon crimp then secure it.
  Get your ribbon and hook the jump ring on the ribbon crimp then secure it.
Easy & Quick DIY Choker Necklaces-Third step, get your head pin and a white bead.
Third step, get your head pin and a white bead. 
Easy & Quick DIY Choker Necklaces-Take the head pin and put it through the bead and then use your scissors to cut the (extra pin) (if you think it's too long for you to make a hooker.)
Take the head pin and put it through the bead and then use your scissors to cut the (extra pin) (if you think it's too long for you to make a hooker.)
Easy & Quick DIY Choker Necklaces-Use your pliers to shape it to a bulb shape.
Use your pliers to shape it to a bulb shape. 
Easy & Quick DIY Choker Necklaces-Then you hook it on the other end of the gold chain and secure it with your plier.Easy & Quick DIY Choker Necklaces-vThen you hook it on the other end of the gold chain and secure it with your plier.
Then you hook it on the other end of the gold chain and secure it with your plier.
Easy & Quick DIY Choker Necklaces-Again, your make a gap in between your jump ring and hook the claw clasps on your jump ring.
Again, your make a gap in between your jump ring and hook the claw clasps on your jump ring.
Easy & Quick DIY Choker Necklaces- After that take the other end of your crimp, hook it on the jump ring as well, secure it and you're ready to wear! Easy & Quick DIY Choker Necklaces- After that take the other end of your crimp, hook it on the jump ring as well, secure it and you're ready to wear!
 After that take the other end of your crimp, hook it on the jump ring as well, secure it and you're ready to wear! 

Done!!!
Easy & Quick DIY Choker Necklaces

Easy & Quick DIY Choker Necklaces
You can check out the full video tutorial here.
If you have any questions about how I made this, feel free to ask in the comments!

☟☟FOLLOW ME☟☟

Lynetteteemakeup © 

Skin Care: DIY Homemade Lemon Toner

Skin Care: DIY Homemade Lemon Toner 
In my last video, I show you how to make your own Cucumber Milk Cleanser. Now, we all know that the next step after you cleanse your face is applying a toner. So, I decided to make my very own lemon toner. It is alcohol free, paraben free, it brightens our skin and also lighten acne scars for people with acne-prone skin. Long story short, cucumbers and lemons works wonders for our skin.

Item used :-
1. Half a lemon
2. A glass of water
3. A bowl
4. Knife
5. Tea spoon
6. Cotton pads 

Steps:-
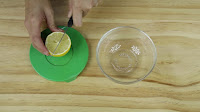
Get your lemon cut it to a "+" on your lemon
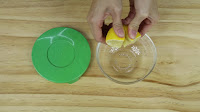
Squeeeeze all the juice out
Squeeze all the juice out
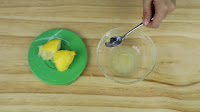
Get your tea spoon and scoop out the seeds 
Get your tea spoon and scoop out the seeds
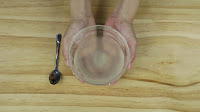
Get your glass of water, then pour it into the lemon juice
Stir the mixture
Stir the mixture
Homemade Lemon Toner is Done
Homemade Lemon Toner is Done! (Easy right!?)
 To Apply:-
Get my cotton pad and soak it into my freshly made toner
I'm gonna wipe it all over my face gently in dabbing motion and a litter massage to help the toner absorb into my skin

You can check out the full video tutorial.
Hope you guys enjoy the video and feel free to leave your comment to tell me how it work for you. See ya~

☟☟FOLLOW ME☟☟

Lynetteteemakeup ©