Showing posts with label halloween. Show all posts

Sunday, 6 November 2016

DIY Latex Prosthetic

DIY Latex Prosthetic Tutorial
Hello there, hope everyone is doing well. Now I am going to show you guys on how to create a prosthetic with Latex.
 
In this tutorial, I am doing a prosthetic nose for my Valak makeup so make sure you create your own! ;-)

Products used:-
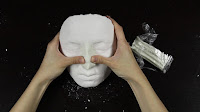
1. Face cast
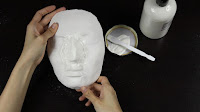
2. Liquid Latex
3. Clay
4. Appliance, metal cover cap
5. Spatula

Steps:-
  DIY Latex Prosthetic - Now, pull out some of the clay and give it a good massage with your fingers to soften it.So that it'll be easier to shape.
Now, pull out some of the clay and give it a good massage with your fingers to soften it.So that it'll be easier to shape.
  DIY Latex Prosthetic - The best way to shape it is use rubbing motion and use your thumb to shape it according to the shape of the nose.
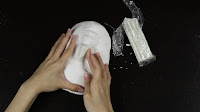
 The best way to shape it is use rubbing motion and use your thumb to shape it according to the shape of the nose.
  DIY Latex Prosthetic - You can overlap the clay to make it even. Make sure each areas of the nose are covered evenly with clay.
You can overlap the clay to make it even. Make sure each areas of the nose are covered evenly with clay.
 DIY Latex Prosthetic - After covering everything, squeeze the bridge of the nose to achieve a more defined nose. DIY Latex Prosthetic - After covering everything, squeeze the bridge of the nose to achieve a more defined nose.
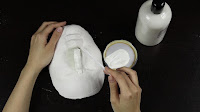
 After covering everything, squeeze the bridge of the nose to achieve a more defined nose.
 DIY Latex Prosthetic -  Pour a good amount of liquid latex, use the spatula and scoop some liquid latex and apply it on the nose.
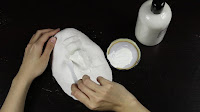
 Pour a good amount of liquid latex, use the spatula and scoop some liquid latex and apply it on the nose.
  DIY Latex Prosthetic - Remember to spread evenly and apply on the edges as well, apply it layer by layer.
Remember to spread evenly and apply on the edges as well, apply it layer by layer. 

 DIY Latex Prosthetic - You can also apply another layer of liquid latex if you prefer it thickerl.
You can also apply another layer of liquid latex if you prefer it thickerl.
 DIY Latex Prosthetic - Then, let it dry.
Then, let it dry. 
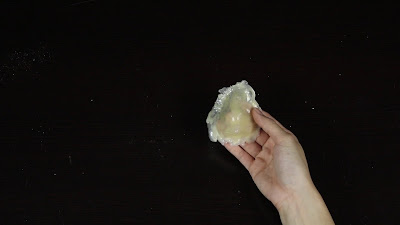
 DIY Latex Prosthetic - It will turn into yellowish color after it is dried up.
It will turn into yellowish color after it is dried up. 
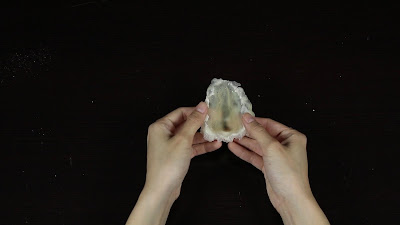
 DIY Latex Prosthetic - Gently peel the latex to form the shape of the nose. DIY Latex Prosthetic - Gently peel the latex to form the shape of the nose.
Gently peel the latex to form the shape of the nose. 


Done!!!
 DIY Latex Prosthetic

 DIY Latex Prosthetic
Check out the complete tutorial and feel free to leave your comment! Good luck! ❤

 ☟☟FOLLOW ME☟☟
•Facebook: https://www.facebook.com/lynetteteemakeup
•Instagram: http://instagram.com/lynetteteemakeup/
•Tumblr: http://lynetteteemakeup.tumblr.com/
•Twitter: http://twitter.com/lynettetee04
•Pinterest: http://pinterest.com/lynettetee/
•Google+: https://plus.google.com/101277215250143088710/

Lynetteteemakeup ©

Saturday, 5 November 2016

DIY Face Cast

DIY Face Cast Tutorial
Hello there, I am back again and this time I will be showing you how to create a face cast.  I did it with a super-fast and easy way to make a mold of your own face and create the face cast. This will be used in my Valak makeup so make sure you create your own :-)

Products used:- 
1. Glue
2. Plaster gauze
3. Vaseline
4. Bowl
5. Plastic foil
6. Plaster
7. Sand paper
8. File/ spatula
9. Water
10. Mirror
11. Scissor
12. Casting powder

Steps:-
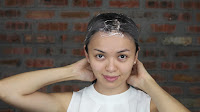
Diy face cast - Firstly, remove all your make up.
Firstly, remove all your make up.
 Diy face cast - Then make sure your hair are all tide up neatly into a ponytail.
Then make sure your hair are all tide up neatly into a ponytail.
Diy face cast - After that, take the plastic foil, put it on your head, measure it and cut it. Make sure the foil is big enough to cover your head!
After that, take the plastic foil, put it on your head, measure it and cut it. Make sure the foil is big enough to cover your head! 
Diy face cast - Apply Vaseline on your eyebrows,eyelashes and hairline. This is a very important step because you don't want your hair to stick on the plaster gauze!
Apply Vaseline on your eyebrows,eyelashes and hairline. This is a very important step because you don't want your hair to stick on the plaster gauze!
Diy face cast - Then, cut the plaster gauze into few pieces. Big pieces are for areas like forehead or face. As for small pieces are for areas like your chin or your nose.
Then, cut the plaster gauze into few pieces. Big pieces are for areas like forehead or face. As for small pieces are for areas like your chin or your nose.  Diy face cast - Soak it with water and place it onto your face (start from the forehead, cheek, chin, jawline, nose & eyes area). Don’t cover your nostrils, you need to breath!  Diy face cast - Soak it with water and place it onto your face (start from the forehead, cheek, chin, jawline, nose & eyes area). Don’t cover your nostrils, you need to breath!
 Soak it with water and place it onto your face (start from the forehead, cheek, chin, jawline, nose & eyes area). Don’t cover your nostrils, you need to breath!  
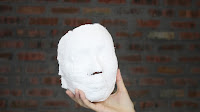
Diy face cast -  When you're done covering up, wait until it hardens then gently remove it.Diy face cast -  When you're done covering up, wait until it hardens then gently remove it.
 When you're done covering up, wait until it hardens then gently remove it.
Diy face cast - Put your mask under the lights and see if you need to cover up some more; cover the parts where is thin. Diy face cast - Put your mask under the lights and see if you need to cover up some more; cover the parts where is thin.
Put your mask under the lights and see if you need to cover up some more; cover the parts where is thin. 
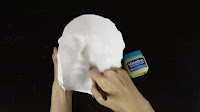
Diy face cast - Apply Vaseline all over the back of your mask.
Apply Vaseline all over the back of your mask.
Diy face cast - Then get an empty container, pour 1:2 portion of water and casting powder into the container and mix it until it become a creamy, bubble free paste. You may Shake a little to get rid of the bubble as much as possible. Diy face cast - Then get an empty container, pour 1:2 portion of water and casting powder into the container and mix it until it become a creamy, bubble free paste. You may Shake a little to get rid of the bubble as much as possible.
Then get an empty container, pour 1:2 portion of water and casting powder into the container and mix it until it become a creamy, bubble free paste. You may Shake a little to get rid of the bubble as much as possible. 
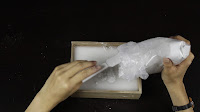
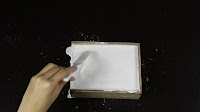
Diy face cast - Then, pour the paste onto your mask and leave it to dry for a night.
Then, pour the paste onto your mask and leave it to dry for a night.  Diy face cast - Remember, put the mask on a plastic container to support it.
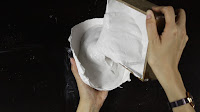
Remember, put the mask on a plastic container to support it.  Diy face cast - After it's dried up, remove all the plaster gauze from the casting paste.
After it's dried up, remove all the plaster gauze from the casting paste.
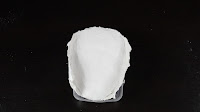
Diy face cast - Then, use sand paper to smoothen the surface of your mask.
Then, use sand paper to smoothen the surface of your mask.
Diy face cast - For areas like eyes, nose, nostrils or lips you can use file to sculpt it to make it more define.  
For areas like eyes, nose, nostrils or lips you can use file to sculpt it to make it more define. 


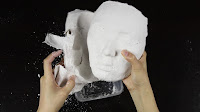
And you're done! 
Diy face cast

☟☟FOLLOW ME☟☟
•Facebook: https://www.facebook.com/lynetteteemakeup
•Instagram: http://instagram.com/lynetteteemakeup/
•Tumblr: http://lynetteteemakeup.tumblr.com/
•Twitter: http://twitter.com/lynettetee04
•Pinterest: http://pinterest.com/lynettetee/
•Google+: https://plus.google.com/101277215250143088710/

Lynetteteemakeup ©

Tuesday, 1 November 2016

Conjuring 2: Valak Makeup (The Nun)

Conjuring 2: Valak make up (The Nun)
Hey guys! This Halloween I’m gonna show you guys how to do a Valak makeup, which is the Demon Nun in Conjuring 2.

Products used:- 
1. Make Up Forever Plasto wax
3. Prosthetic nose and eyelashes glue
4. Prosthetic cheek and eyebrow
7. Clown white foundation with small eyeshadow brush
8. Mehron Setting Powder in #UltraWhite with loose powder brush
9. Kryolan Supracolor in #071 and eyeshadow brush
10. Catrice Black eyeshadow and eyeshadow brush
11. Benefit Longwear Powder Shadow #Kissme, I’m tipsy and shadow brush
12. Benefit Long Wear Powder Shadow and shadow brush
13. Kryolan Supracolor in #071 and liner brush

 Conjuring 2: Valak make up (The Nun) - First of all, cover up the eyebrow with Plasto wax, as Valak got no eyebrows.
First of all, cover up the eyebrow with Plasto wax, as Valak got no eyebrows. 
Conjuring 2: Valak make up (The Nun) - Then apply the setting powder to your eyebrows to avoid stickiness.
Then apply the setting powder to your eyebrows to avoid stickiness.
Conjuring 2: Valak make up (The Nun) - Use eyelashes glue and apply at the back of the prosthetic nose.
Use eyelashes glue and apply at the back of the prosthetic nose.
Conjuring 2: Valak make up (The Nun) - Sticked it on.
Sticked it on.
Conjuring 2: Valak make up (The Nun) - I apply liquid latex on the edges of the nose, so that it looks smooth on the edge.
 I apply liquid latex on the edges of the nose, so that it looks smooth on the edge. 
Conjuring 2: Valak make up (The Nun) - I will do the same thing for my cheeks and brow bones area, as Valak had sagging cheeks and large brow bones.
I will do the same thing for my cheeks and brow bones area, as Valak had sagging cheeks and large brow bones. 
Conjuring 2: Valak make up (The Nun) - After that, leave it to dry for few minutes.
After that, leave it to dry for few minutes. 
Conjuring 2: Valak make up (The Nun) -Once they are fully dried, it is time to apply clown white foundation as Valak has a white face.Use the beauty blender and use dabbing motion to apply the foundation.
Once they are fully dried, it is time to apply clown white foundation as Valak has a white face.Use the beauty blender and use dabbing motion to apply the foundation.
 Conjuring 2: Valak make up (The Nun) -  Moving on, use a small eyeshadow brush to apply on areas that you can't apply with beauty blender.
 Moving on, use a small eyeshadow brush to apply on areas that you can't apply with beauty blender. 
Conjuring 2: Valak make up (The Nun) - Next, apply black cream color to create a deep, dark eyes like Valak.
Next, apply black cream color to create a deep, dark eyes like Valak.
Conjuring 2: Valak make up (The Nun) - After that, slowly drag the cream color outwards from brow bone.
After that, slowly drag the cream color outwards from brow bone.
Conjuring 2: Valak make up (The Nun) - Then apply a small part on your lower lash as well for a deeper, darker eyes.
Then apply a small part on your lower lash as well for a deeper, darker eyes.
Conjuring 2: Valak make up (The Nun) - Do the same for the other eye.
Do the same for the other eye.
Conjuring 2: Valak make up (The Nun) -  Apply the same cream color on your lips. Remember, Valak has a thin square shaped lip. So just draw a square shape at the corner of your lips.
 Apply the same cream color on your lips. Remember, Valak has a thin square shaped lip. So just draw a square shape at the corner of your lips.
Conjuring 2: Valak make up (The Nun) - To perfect it, use black eyeshadow and dab it on your lids to prevent it from creasing and also to make it last longer, apply it all over your eyes and your black lips as well.
 To perfect it, use black eyeshadow and dab it on your lids to prevent it from creasing and also to make it last longer, apply it all over your eyes and your black lips as well.
Conjuring 2: Valak make up (The Nun) - Drag some shadow down for that horror effect.Conjuring 2: Valak make up (The Nun) - Drag some shadow down for that horror effect.
 Drag some shadow down for that horror effect.
Conjuring 2: Valak make up (The Nun) - Next, use dark brown eyeshadow and apply it on wrinkled areas to define it.
Next, use dark brown eyeshadow and apply it on wrinkled areas to define it.
 Conjuring 2: Valak make up (The Nun) - Then, randomly blend the eyeshadow to create a dirty messy look. As messy and dirty as you like.
Then, randomly blend the eyeshadow to create a dirty messy look. As messy and dirty as you like.
 Conjuring 2: Valak make up (The Nun) -To make my Valak look even more perfect, I'm gonna use eyeliner brush and black cream to draw random lines below my lip, eyelids, forehead and the higher point of the nose bridge for that old, dirty and rotten like skin.
 To make my Valak look even more perfect, I'm gonna use eyeliner brush and black cream to draw random lines below my lip, eyelids, forehead and the higher point of the nose bridge for that old, dirty and rotten like skin.
Conjuring 2: Valak make up (The Nun) -  Now, we've come to the last part of this tutorial, im gonna use a cotton bud to clean my teeth before I apply black ink to my teeth. It's very easy.
 Now, we've come to the last part of this tutorial, i'm gonna use a cotton bud to clean my teeth before I apply black ink to my teeth. It's very easy.
Conjuring 2: Valak make up (The Nun) - Just apply it around your teeth, you don't want to color everything because you want that rotten teeth effect. Just randomly apply it and you're done and good to scare the heck out of everyone! 
Just apply it around your teeth, you don't want to color everything because you want that rotten teeth effect. Just randomly apply it and you're done and good to scare the heck out of everyone!

Done!!!
.

..

...

....

.....
 
Conjuring 2: Valak make up (The Nun)
Hope you guys enjoy the video & have a spooky Halloween!!
Check out the complete tutorial and feel free to leave your comment! Good luck!

 ☟☟FOLLOW ME☟☟

Lynetteteemakeup ©