Saturday, 5 November 2016

DIY Face Cast

DIY Face Cast Tutorial
Hello there, I am back again and this time I will be showing you how to create a face cast.  I did it with a super-fast and easy way to make a mold of your own face and create the face cast. This will be used in my Valak makeup so make sure you create your own :-)

Products used:- 
1. Glue
2. Plaster gauze
3. Vaseline
4. Bowl
5. Plastic foil
6. Plaster
7. Sand paper
8. File/ spatula
9. Water
10. Mirror
11. Scissor
12. Casting powder

Steps:-
Diy face cast - Firstly, remove all your make up.
Firstly, remove all your make up.
 Diy face cast - Then make sure your hair are all tide up neatly into a ponytail.
Then make sure your hair are all tide up neatly into a ponytail.
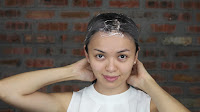
Diy face cast - After that, take the plastic foil, put it on your head, measure it and cut it. Make sure the foil is big enough to cover your head!
After that, take the plastic foil, put it on your head, measure it and cut it. Make sure the foil is big enough to cover your head! 
Diy face cast - Apply Vaseline on your eyebrows,eyelashes and hairline. This is a very important step because you don't want your hair to stick on the plaster gauze!
Apply Vaseline on your eyebrows,eyelashes and hairline. This is a very important step because you don't want your hair to stick on the plaster gauze!
Diy face cast - Then, cut the plaster gauze into few pieces. Big pieces are for areas like forehead or face. As for small pieces are for areas like your chin or your nose.
Then, cut the plaster gauze into few pieces. Big pieces are for areas like forehead or face. As for small pieces are for areas like your chin or your nose.  Diy face cast - Soak it with water and place it onto your face (start from the forehead, cheek, chin, jawline, nose & eyes area). Don’t cover your nostrils, you need to breath!  Diy face cast - Soak it with water and place it onto your face (start from the forehead, cheek, chin, jawline, nose & eyes area). Don’t cover your nostrils, you need to breath!
 Soak it with water and place it onto your face (start from the forehead, cheek, chin, jawline, nose & eyes area). Don’t cover your nostrils, you need to breath!  
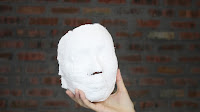
Diy face cast -  When you're done covering up, wait until it hardens then gently remove it.Diy face cast -  When you're done covering up, wait until it hardens then gently remove it.
 When you're done covering up, wait until it hardens then gently remove it.
Diy face cast - Put your mask under the lights and see if you need to cover up some more; cover the parts where is thin. Diy face cast - Put your mask under the lights and see if you need to cover up some more; cover the parts where is thin.
Put your mask under the lights and see if you need to cover up some more; cover the parts where is thin. 
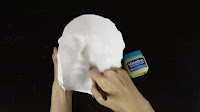
Diy face cast - Apply Vaseline all over the back of your mask.
Apply Vaseline all over the back of your mask.
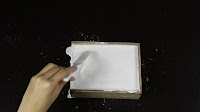
Diy face cast - Then get an empty container, pour 1:2 portion of water and casting powder into the container and mix it until it become a creamy, bubble free paste. You may Shake a little to get rid of the bubble as much as possible. Diy face cast - Then get an empty container, pour 1:2 portion of water and casting powder into the container and mix it until it become a creamy, bubble free paste. You may Shake a little to get rid of the bubble as much as possible.
Then get an empty container, pour 1:2 portion of water and casting powder into the container and mix it until it become a creamy, bubble free paste. You may Shake a little to get rid of the bubble as much as possible. 
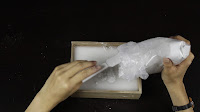
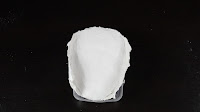
Diy face cast - Then, pour the paste onto your mask and leave it to dry for a night.
Then, pour the paste onto your mask and leave it to dry for a night.  Diy face cast - Remember, put the mask on a plastic container to support it.
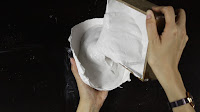
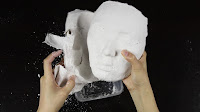
Remember, put the mask on a plastic container to support it.  Diy face cast - After it's dried up, remove all the plaster gauze from the casting paste.
After it's dried up, remove all the plaster gauze from the casting paste.
Diy face cast - Then, use sand paper to smoothen the surface of your mask.
Then, use sand paper to smoothen the surface of your mask.
Diy face cast - For areas like eyes, nose, nostrils or lips you can use file to sculpt it to make it more define.  
For areas like eyes, nose, nostrils or lips you can use file to sculpt it to make it more define. 


And you're done! 
Diy face cast

☟☟FOLLOW ME☟☟
•Facebook: https://www.facebook.com/lynetteteemakeup
•Instagram: http://instagram.com/lynetteteemakeup/
•Tumblr: http://lynetteteemakeup.tumblr.com/
•Twitter: http://twitter.com/lynettetee04
•Pinterest: http://pinterest.com/lynettetee/
•Google+: https://plus.google.com/101277215250143088710/

Lynetteteemakeup ©

No comments:

Post a Comment